Understanding Hockey Stick Curves and Blade Patterns
Posted by Matt Stathopoulos on 08 27 2024
What a Hockey Stick Curve Chart Tells You
Simply put, a hockey stick curve chart is a visual guide that compares different blade patterns, showing you how the shape of each curve affects your puck control, release, and shot trajectory. By reviewing charts that map the popular patterns and brand equivalents, you can quickly narrow down which curve best fits your style of play and position on the ice.
How Curve Shape Influences Control and Shot Mechanics
Hockey stick blade curves change how the blade meets the puck and ice, directly impacting how you stickhandle, pass, and shoot. Even the most minor differences in pattern, lie, and curve depth can change your accuracy and comfort with the stick.
- More curve toward the toe: Quicker release and easier lift on shots, but slightly less predictability on simple passes.
- More curve toward the heel: Stronger, heavier shots and easier puck pickups along the boards, with a flatter, more stable feel.
- Deeper overall curve: Helps lift and spin the puck but can make backhand passes and shots harder to control.
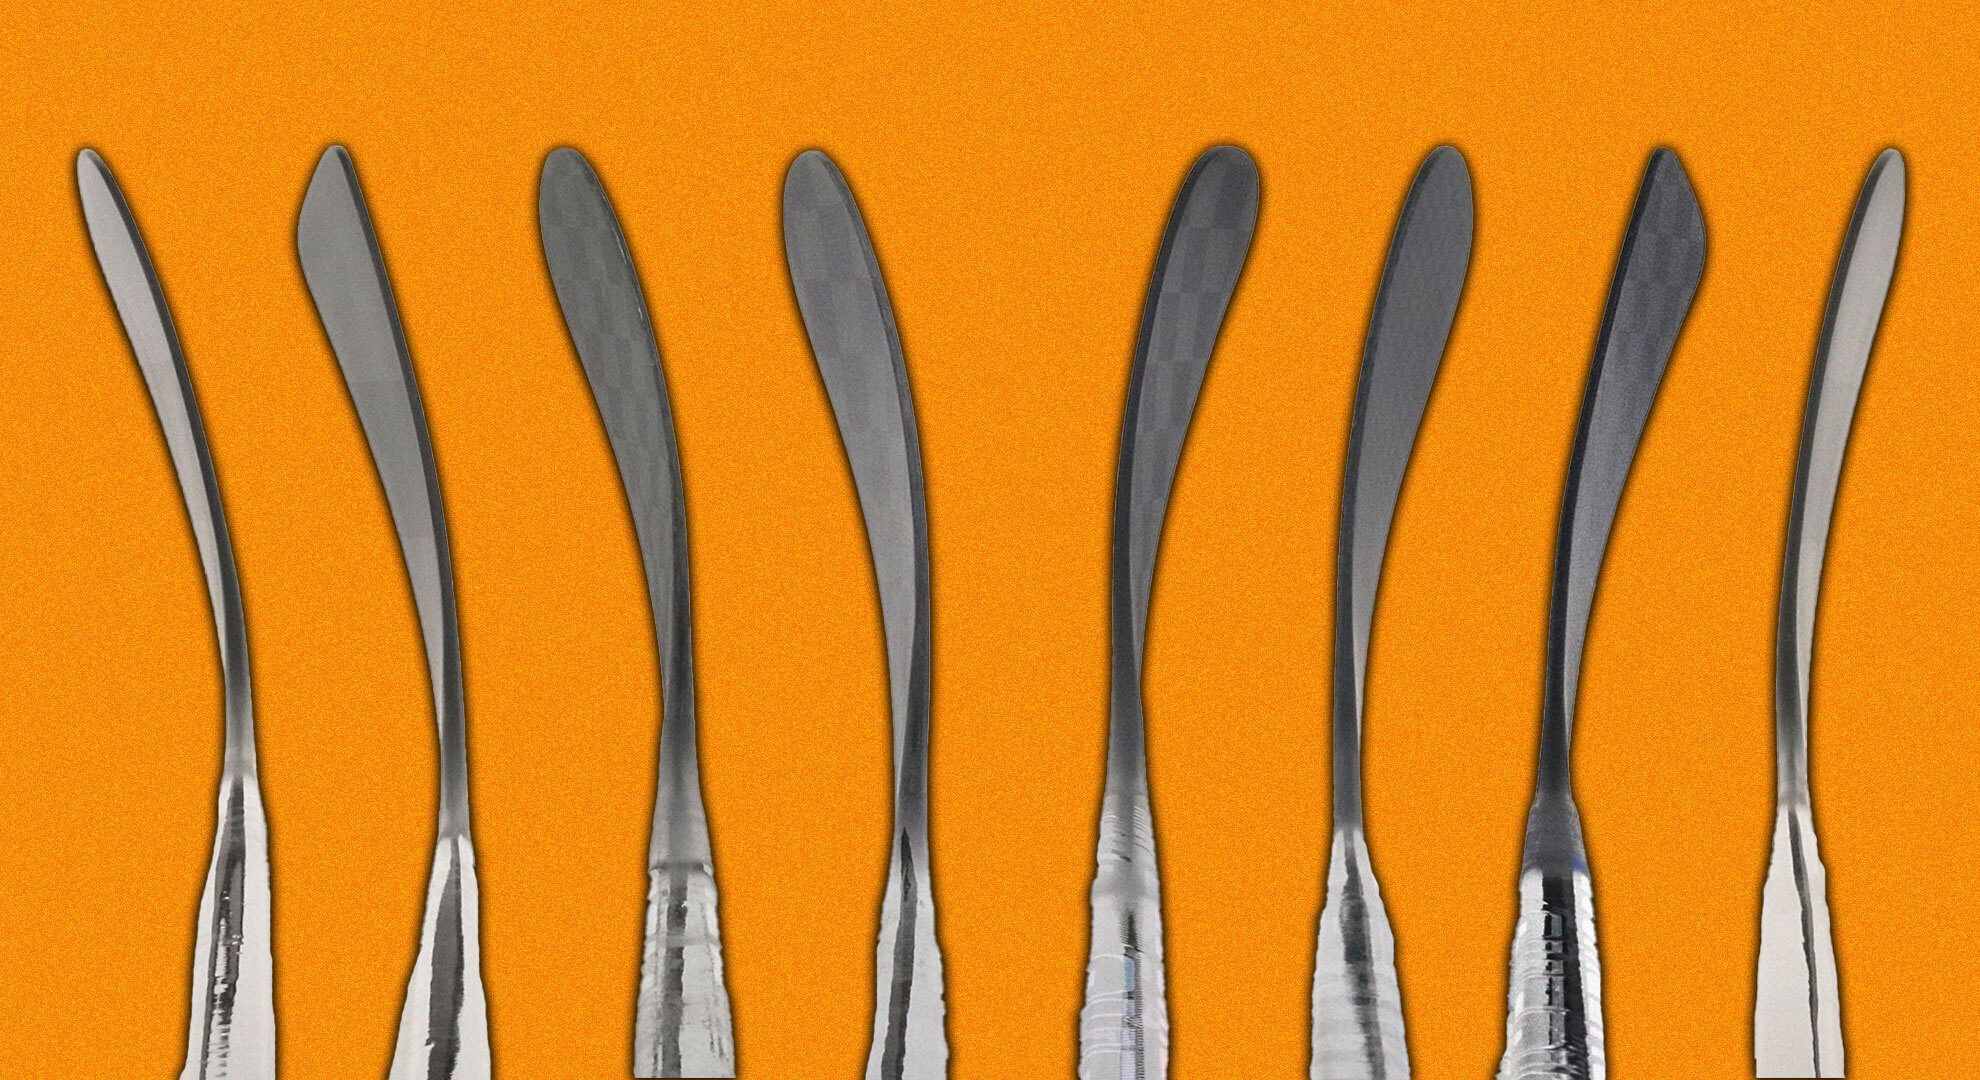
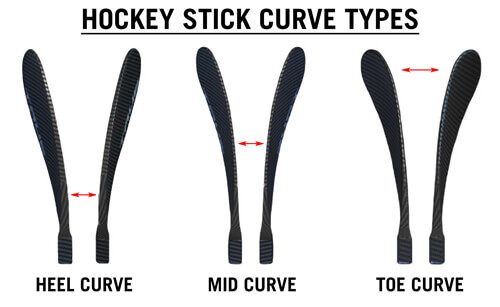
Toe, Mid, and Heel Curves: When Each Works Best
Toe curves
Toe curves put most of the bend toward the end of the blade, making them popular with players who like to keep the puck in tight and get shots off quickly. A toe curve helps you pull the puck in and snap it up under the bar, which is ideal for forwards who rely on quick wrist and snap shots around the slot or off the rush.
Mid curves
Mid curves place the deepest part of the curve near the center of the blade. This is the most balanced option, giving you a reliable mix of puck control, passing accuracy, and shooting versatility. If you play in all situations, take both wrist and slap shots, or simply want something that “just works” in most scenarios, a mid curve is often the safest bet.
Heel curves
Heel curves shift the bend closer to the back of the blade. This shape helps with powerful shots from farther out, since it keeps more of the blade flat on the ice as you load up. Many defensemen and players who prefer taking one-timers or point shots like heel curves for their stability and ability to keep pucks low and heavy.
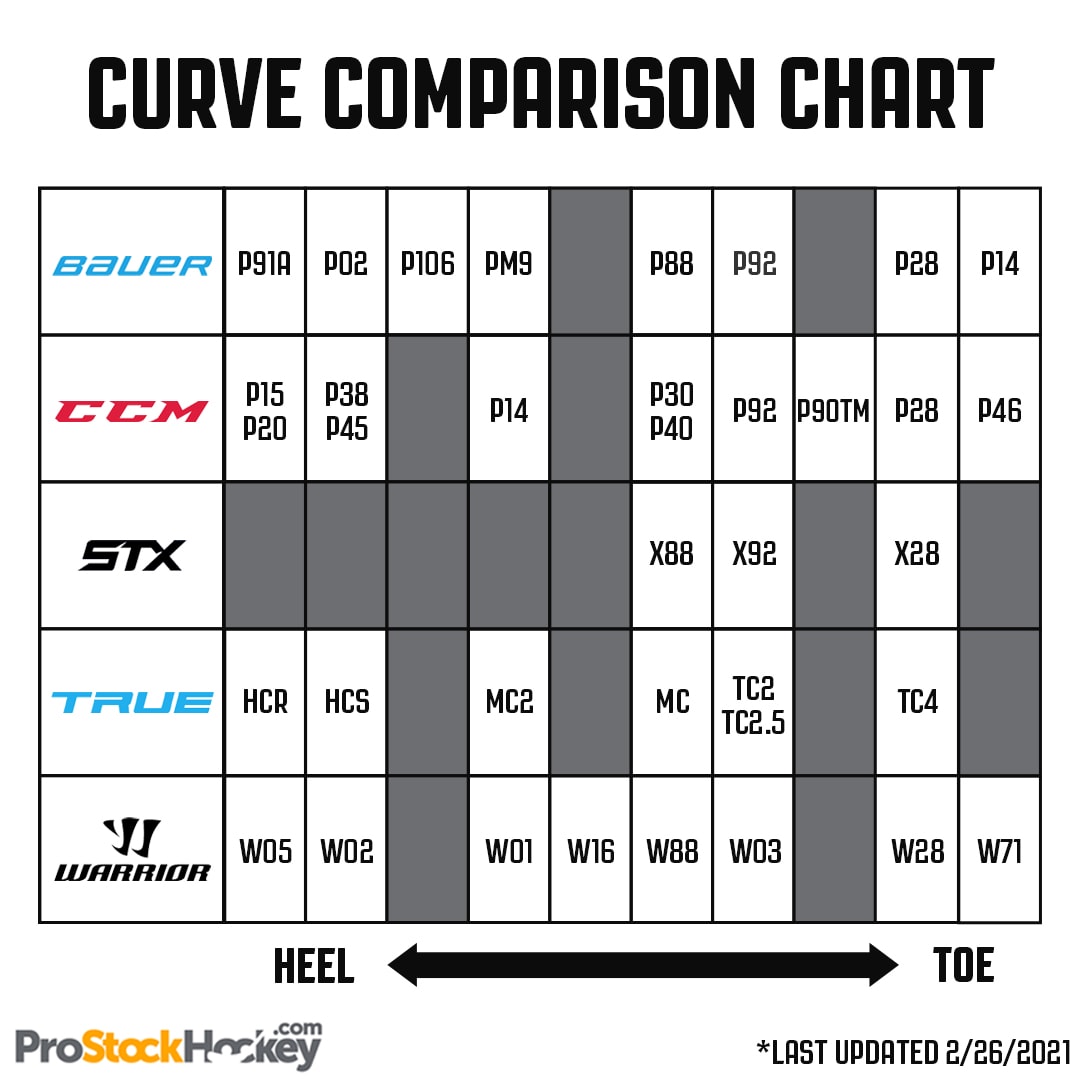
Curve Chart: P92 vs P88 vs P28 (and Brand Equivalents)
Most modern hockey stick blade curves come in a few “families” that are available across brands. A typical hockey stick curve chart will showcase how popular patterns compare, so you can find something similar even if you switch brands. Here are three of the most common types you’ll see:
- P92 / P29–Style Mid Curve
- Examples: Bauer P92, CCM P29, Warrior W03
- Feel: Balanced mid curve with medium depth.
- Best for: All-around players seeking easy puck handling, accurate passing, and reliable wrist and snap shots.
- P88–Style Mid Curve with Flatter Toe
- Examples: Bauer P88, Warrior W88 (similar family)
- Feel: Slightly less curve overall with a more traditional look.
- Best for: Players who like a classic blade feel, strong backhands, and clean, predictable puck control.
- P28–Style Toe Curve
- Examples: Bauer P28, CCM P28, Warrior W28
- Feel: Aggressive toe curve with an open face.
- Best for: Players who pull the puck in close to the body, love quick toe drags, and want to get pucks up quickly from in tight.
A good chart will line these patterns side-by-side so you can see where the curve starts, how deep it is, and how open the face is at the toe.
Lie Angle (5–6) and Curve Depth: Fit and Feel on the Ice
Lie angle is the way the shaft lines up with the blade when the stick is on the ice. Most player sticks fall between lie 5 and 6. With the correct lie, the middle of your blade contacts the ice in your normal skating stance, improving your balance, puck control, and comfort.
Curve depth describes how much the blade bends away from a straight line; a shallow curve offers more predictable passing and cleaner backhands, while a deeper curve makes it easier to lift the puck and add spin to shots.
- Consider a higher lie (6+) if the heel of your blade wears down first or you naturally skate more upright.
- Consider a lower lie (5 or below) if the toe wears out quickly or you have a lower, more aggressive skating stance.
Position-Based Curve Recommendations
While each player has unique preferences, certain blade shapes tend to match certain roles on the ice:
- Centers: Centers handle the puck in all areas of the rink and need to win draws, dish passes, and get quick shots off in traffic. A mid or toe curve works well here; many centers prefer a versatile P92–style pattern that feels comfortable for faceoffs, quick touches, and fast releases.
- Wingers: Wingers often attack off the rush, fire one-timers, and take quick shots from the circles. A toe curve like a P28–style pattern helps load the puck on the toe and snap it high quickly, while a mid curve gives you a more balanced feel if you also make a lot of controlled zone exits and entries.
- Defensemen: Defensemen have to hold pucks at the blue line, take point shots, and make strong breakout passes. Many blue-liners like heel or slightly deeper mid curves that keep shots heavy and low from distance, so a P88–style pattern can provide a stable feel for clearing the puck and taking slap shots from the point.
How to Choose the Right Curve for Your Game
Once you understand the patterns, you can dial in the curve that corresponds to your game. A few practical considerations:
- Match your main shot type: If you rely on quick wrist and snap shots, look at toe and aggressive mid curves. If you take lots of slap shots or point shots, a mid or heel curve may feel better. Pair your curve with the right hockey stick flex to get the most from your shot.
- Check your handedness and stance: Make sure you’re using the correct blade for how you naturally hold the stick. If you’re still not sure which side feels right, our guide to understanding hockey stick handedness can help.
- Start with the right length: Stick length changes how the lie and curve feel on the ice. Before deciding a pattern is “wrong,” make sure your stick is cut and sized correctly by following our guide on how to measure a hockey stick.
- Pay attention to where your tape wears out: Look at your blade tape after a few skates. If the heel is worn and the toe still looks fresh, your lie or length may be too high. If only the toe is chewed up, you may be using too low of a lie or a stick that’s too short. Our explainer on how to tape a hockey stick can also help you fine-tune grip and feel.
- Try similar patterns across brands: If you like how one curve feels, look for its equivalents in other lines. For example, you might compare Bauer hockey sticks with similar patterns from CCM, Warrior, True, Easton, or Sherwood to find the curve that feels best without starting from scratch.
If you want to experiment, consider starting with a proven mid-curve pattern from our selection of player hockey sticks and then moving more toe- or heel-focused as your preferences emerge.
FAQs About Hockey Stick Curves
What curve is better, P28 or P92?
Neither is universally better; P28 offers a more aggressive toe curve for quick, elevated shots in tight, while P92 is a balanced mid curve that works for a wider range of players and situations.
What hockey stick curve should I use?
Choose a curve that matches your main shot type, position, and comfort level: mid curves for all-around play, toe curves for quick scoring, and heel curves for heavier shots and simple, stable puck control.
How do I determine the curve on a hockey stick?
Look for the pattern name or code printed near the heel of the blade or on the shaft, then compare it to a hockey stick curve chart from the brand or retailer to see where it falls (toe, mid, or heel and how deep it is).
Should I use 75 or 85 flex?
In general, lighter players tend to use a lower flex (like 75) for easier loading, while stronger players often move up to 85 or higher. However, your ideal flex also depends on your shot mechanics and preference.
Bringing Curve, Pattern, and Lie Together
Knowing how hockey curve types, blade patterns, lie angles, and curve depths all work together gives you a clear starting point when you’re choosing your next stick. Instead of guessing, you can use a hockey stick curve chart to compare popular patterns, match them to your position and shooting style, and feel more confident every time you step on the ice.
When you’re ready to put that knowledge into practice, shop all hockey sticks and find the pattern that fits your game.