Creating A Pro Stock Stick
Posted by AJ Lee on 04 12 2016

It’s every hockey player’s dream to make it to the NHL.
To play with, and against, the best players in the world, in front of thousands of fans packed into iconic arenas across North America…it’s an opportunity that very few players are given, and one that even fewer are able to capitalize on. In fact, an “elite” player at the college or junior level has just a 5% chance of playing in the NHL.
One of the first indications that a player has “made it” comes when they’re given an opportunity to customize their own stick.
Since the average hockey player (and 95% of the above-average hockey players!) will never experience the process of creating their own personal custom hockey stick, the guys at Pro Stock Hockey have gotten the inside scoop on what it takes to build a custom NHL hockey stick.
Prepare to be insanely jealous.
Step 1: Meet Your Sales Rep
Sales Reps will often develop relationships, and even friendships, with NHL players that are quite strong. This allows players to feel comfortable reaching out to the Sales Rep if they find themselves in a slump, wanting to try something new, are experiencing breakage or require a different level of service. A dedicated Sales Rep from a top hockey stick manufacturer is typically assigned to satisfy the needs of 5-6 NHL teams on average. These individuals visit with the teams as often as they possibly can – no less than 2 times per month. Visits occur both at home and on the road to build a comfort level with the team and players, as well as to provide ample opportunities for players to provide feedback.
Step 2: Evaluation of Needs
Once the player has met his dedicated Sales Rep, the player’s current sticks are sent in to the manufacturer for evaluation. It’s at this time that they sit down with the player to make note of both the positive and negative aspects of their current stick, as well as anything the player may be looking to add or change about the stick. This includes, but is not limited to, concerns with stick height, weight, kick point, curve, consistency, graphics and/or feel.
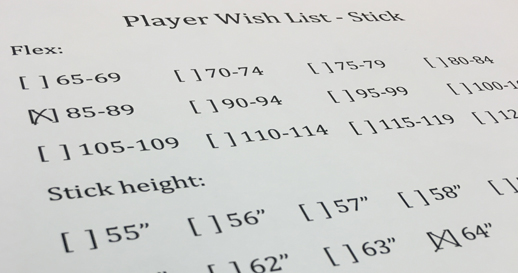
Based off of the feedback provided by the player, a “wish list” is created to represent the player’s idea of their ideal stick. The “wish list” is sent to the manufacturer and the fun begins!
Step 3: Testing
Once the details of the player’s “wish list” have been hammered out, a number of sample sticks are selected to undergo a series of tests to determine structural and performance characteristics.
These tests help determine:
- Overall flex
- Flex profile
- Length
- Weight
- Balance point
- Shaft shape
- Stick finishes
- Blade paddle stiffness
- Shaft/Blade break points
After testing, the sample stick is put through a matching process to determine if the sample curve matches any current mold in their inventory. If the curve is found to be a match, an order is created compiling sample characteristics with player input, and placed into production.
If the curve is not a match, a new mold must be created before production can begin.
Step 4: Mold Making
The curve is “captured” and a 3D solid model is constructed, which is then converted into a 3D mold. The mold file is used to create a CNC machine tool cutting path and the CNC machine is used to mill solid blocks of metal into a production friendly blade mold.
The molds are prepped, polished, approved and sent into production.
Step 5: Starting the Production Process
While the end product may appear to be made from one consistent material, there are actually several materials that go into the manufacturing of a top-of-the-line hockey stick.
First, resin is preimpregnated into a mix of carbon fiber, fiberglass, and Kevlar – this eliminates that step from the production process and insures consistency throughout the material. The carbon fiber, fiberglass, and Kevlar mix is purchased in a 3 ft roll, similar to that of a roll of paper…but much more expensive! This material is purchased from the same suppliers to create jet liners and high-end navy attack boats.
Most high-end performance custom sticks will utilize open and closed cell foams to provide the interior body of the blade. These foams act as the core of the blade around which the prepreg materials can be laid upon. The foam core not only provides structure for the blade, but also much of the feel that makes a blade perform to the desired preference of the player.
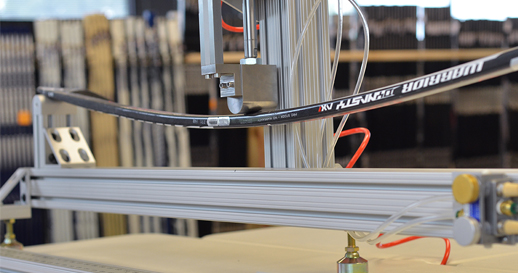
The next step in the production process is cutting the prepreg and foam materials to the specified size. A computer controlled cutting table is used in order to insure that the size and weight of all materials to be used in the stick’s construction remains consistent.
Once the materials are cut to size, the next step is blade preforming. Since there are currently thousands of different blade curves, plus new curves being created each year, the process of blade preforming needs to be done by hand. Factory workers wrap the prepreg materials around the foam core by hand to provide the shell of the blade. The prepreg materials provide stiffness for the blade, while the foam core provides the feel.
The preformed blade is placed into solid metal molds for cooking. The blade preform and the mold match up almost perfectly at this point, but the curing process ensures that all the pieces of prepreg, and the foam core, become one. The blade curing process usually takes about 45 minutes, but for bigger curves (like Ovechkin or Kovalchuk) the process could take closer to 1 hour. The molds are heated to around 200 degrees and are closed under a great amount of pressure using specific bolting patterns.
To create the shaft of the stick, the prepreg materials (already cut to the necessary sizes) are machine wrapped around steel mandrels. Mandrels are specific to the type of shaft being created and also to the shape of the shaft required.
Just like the blade, the shaft will also go through a curing process. Raw prepreg materials are cooked under pressure and heat in order to retain the proper shape and fiber orientation. Depending on the type of stick that the finished shaft is destined to become a part of, the pressure can come from either outside or inside the shaft. Outside pressure can be used to push the material against a mandrel to provide shape, while inside pressure can be applied to push the material against a mold to provide its final shape.
Step 6: Assembly
A common misconception among hockey players is that they think of one-piece sticks as, well, one piece. In fact, a large majority of the one-piece sticks available are actually a blade and shaft fused together using a binding agent like epoxy resins and glues. True one-piece sticks are held together by the actual resin that has been preimpregnated into the material, without the use of an outside bonding agent. Once the blade and shaft have been fused, the full stick is moved along to the next step.
Step 7: Cleaning
The stick is prepped for artwork by cleaning off the outside surfaces of the stick. The outside layer must be free of any releases or contamination that might be left behind from the production process. First, the stick is sent through a sand blaster to gently smooth the surface. A factory worker will then inspect the stick for any imperfections, before wiping the stick down with a cleaning solution and moving them to the next step.
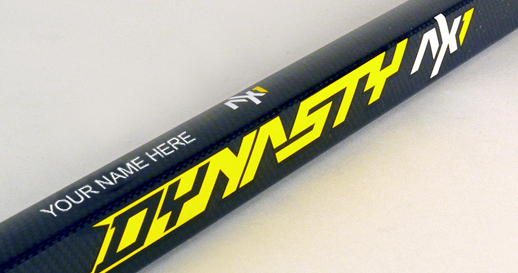
Step 8: Artwork
Once the stick has been smoothed of any imperfections and thoroughly cleaned, its time to add the artwork! Graphics are added to the sticks using either decals or silk screens. Decals can be applied in many different forms, but are commonly used for consistency and weight concerns. In some instances, such as the RBZ Speedburner, a base layer of paint is added to introduce extra color to the stick before the decal is added.

The decal used on a stick doesn’t always match the stick itself. In fact, only about 50% of the graphics used on a stick directly correspond to construction of the stick they’re actually using. Some NHL players prefer to use an older stick model with older technology. The artwork of a manufacturers latest stick model is used on these sticks in order to drive sales – people see Kane using a Bauer Vapor APX2, they buy a Bauer Vapor APX2.
With the artwork and nameplate now added to the stick, it’s time to move to the next step.
Step 9: The Finish
Consisting of both the texture and top coat of the stick, the finish is, fittingly, the last step of the process before packaging. This layer, although insignificant to the actual structure of the stick, provides the immediate interface between the player and the stick. The textures and coatings applied to the stick are extremely sensitive; forcing them to be applied in an extensively controlled environment. Temperature, humidity, dust and even volume of air are all monitored and adjusted as necessary in the finishing environment. The player has the option to choose a clear coat (no grip), a light grip or a heavy grip finish on their stick.

Step 10: Packaging and Shipping
After the final finishing, sticks are immediately placed into protective bags and packed into shipping boxes. Exposure to elements in the production facility can lead to contamination on the surface of the stick.
For a first impression with a pro player receiving his first set of custom sticks, the sticks are hand delivered by the Sales Rep that has been assigned to that team. Immediate feedback is taken during and after practice to determine if the stick samples meet the “wish list” of the player. If the player is happy with the stick, a repeat order is placed. If the player is unhappy with the stick in any way, the process begins again and will continue until the player is completely satisfied.
If every step of the process goes according to plan, and the player is satisfied with the first sample stick created, the whole process could take just 11 business days to complete!